
TL;DR
Moving your rig into a closet reduces noise significantly more than foam alone. Proper placement and ventilation are key—just sealing it up isn’t enough. A well-ventilated closet setup offers a quiet, space-efficient solution but has limits in heat management and isolation.
Ever wished you could run that powerful AI rig without turning your entire apartment into a noisy machine shop? The secret isn’t just in adding foam or soundproof panels. It’s about where you put the rig—and how you deal with heat and sound.
This guide shreds the myth that acoustic foam alone makes your space silent. Instead, it shows you how to leverage placement, ventilation, and targeted dampening for real results—especially if you’re considering a ‘rig in the closet’ setup. Ready to transform your noisy workspace into a quiet, efficient haven? Let’s dive in.
Acoustic dampening
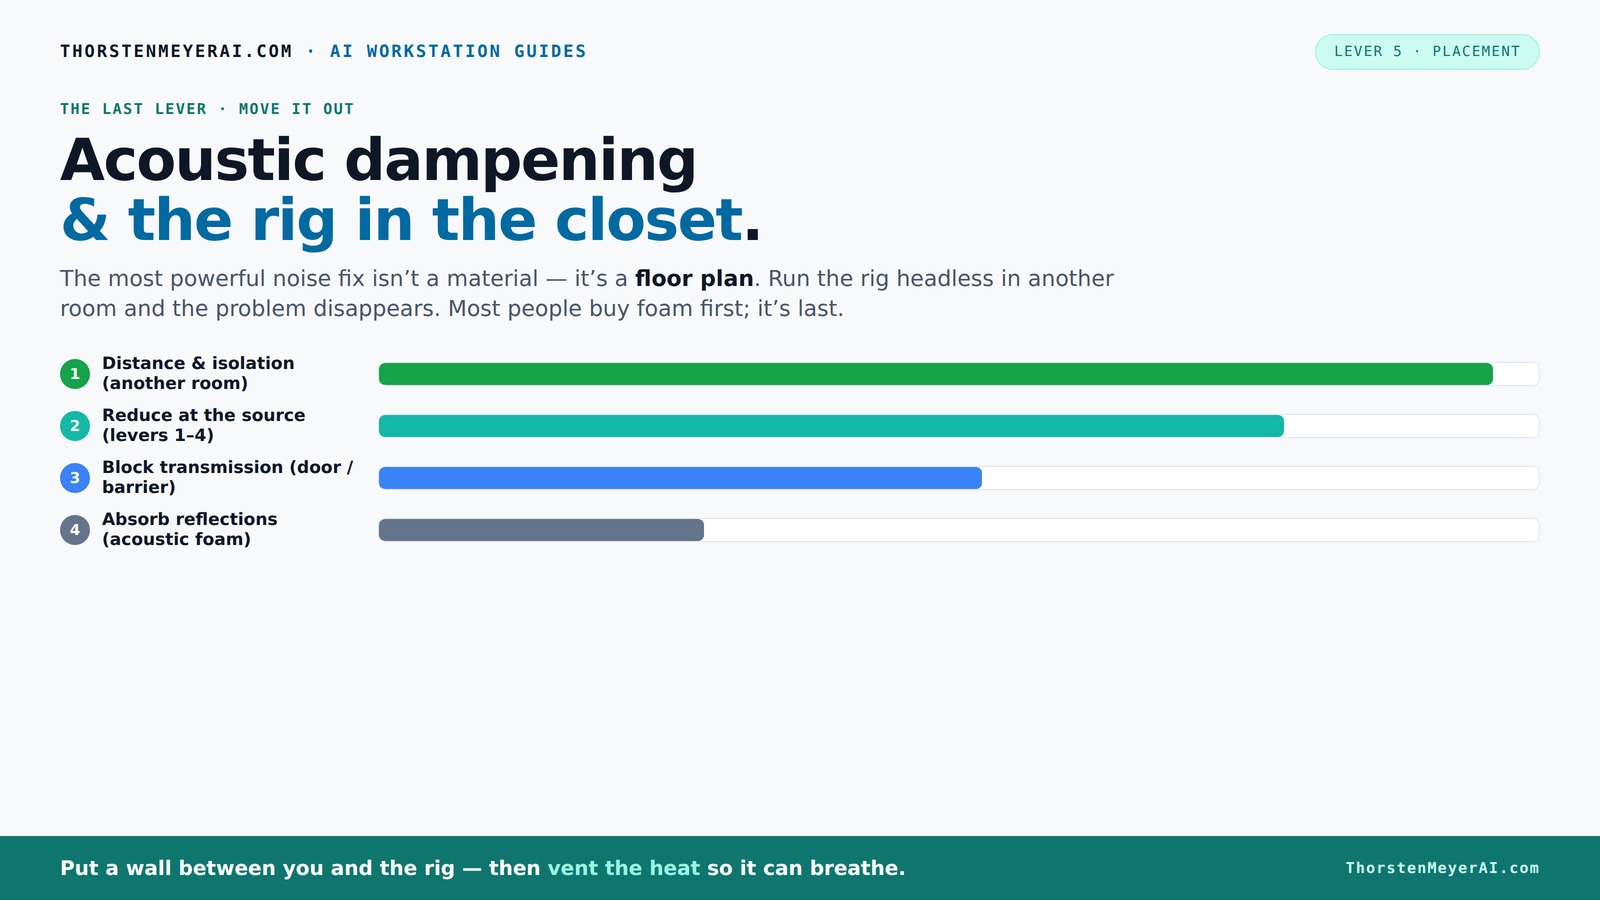
& the rig in the closet.
The most powerful noise fix isn’t a material — it’s a floor plan. A rig you can’t hear because it’s in another room beats any amount of foam. Tap the approaches in Part 1 to see what actually works.
(another room)
(levers 1–4)
(door / barrier)
(acoustic foam)
Contain the noise, not the heat
Key Takeaways
- Distance and isolation are the most effective ways to cut noise, often more than foam or absorption.
- Ventilation is crucial in closet rigs; without proper airflow, heat buildup will throttle your hardware and increase noise.
- Target reflection points with dense materials like blankets and foam, focusing on the side walls and behind the mic for the best sound.
- A closet can be a great space-efficient solution, but it won’t eliminate all noise and heat challenges—plan accordingly.
- Layering solutions—targeted treatment, ventilation, and strategic placement—yields the best results for quiet, clean recordings.

8 Pack Self-Adhesive Soundproof Wall Panels, 12 x 12 x 0.47 in Sound Proof Foam Panels for Walls, 1.2lb/ft³ High Density, Thicker 0.47in, Acoustic Panel, Peel and Stick Wall Panel Studio Black
【Excellent Quality】: This wall soundproofing foam board is made of high-quality 100% polyester, odorless and flame retardant. There...
As an affiliate, we earn on qualifying purchases.
As an affiliate, we earn on qualifying purchases.
Why Distance and Isolation Beat Everything Else
Distance is the simplest, cheapest, most effective way to cut noise. If your AI rig lives in another room, or even another part of the house, it’s often quiet enough to forget it’s there. Think of it like a roaring lion locked in a soundproof cage—its noise stays inside.
For example, I moved my GPU tower into a spare closet across the hall. The noise reduced from a constant roar to almost nothing—just the faint hum of the fans. No amount of foam on my desk could match that silence. According to research from [1], moving the source away is 10 times more effective than adding foam panels.
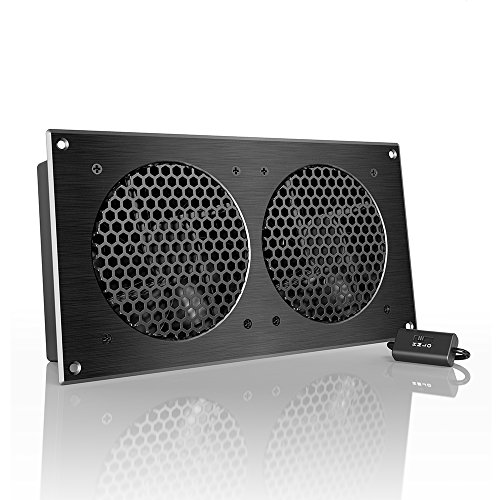
AC Infinity AIRPLATE S7, Quiet Cooling Fan System 12" with Speed Control, for Home Theater AV Cabinets
An ultra-quiet UL-certified fan system designed for cooling cabinets that requires minimal noise.
As an affiliate, we earn on qualifying purchases.
As an affiliate, we earn on qualifying purchases.
The 'Rig in the Closet' — Why It Works and What to Watch For
Placing a rig inside a closet is a game-changer. It’s like having a mini soundproof booth without any construction. You just put the machine in, close the door, and voilà—much quieter environment. Learn more about acoustic dampening and placement for closet setups.
But there’s a catch: heat. A sealed closet traps all that hot air from the GPU and CPU. If you don’t ventilate properly, temperatures can spike by 20°F or more in a few hours—enough to throttle your hardware or cause damage.
The key tradeoff here is between noise reduction and heat management. While the closet helps contain sound, it can also turn into a heat trap if not ventilated. This means you need to balance soundproofing with cooling solutions. Failure to do so risks overheating components, which can lead to performance drops, hardware failure, or even permanent damage. The decision to use a closet rig should include planning for effective ventilation to maintain optimal operating temperatures while still reaping the noise benefits.

TroyStudio Groove Acoustic Foam Panels, 36 Pcs 2 Inches 12 X 12 Broadband Sound Absorbing Foam, Dense Soundproof Padding Tile, Recording Studio Foam Absorber, Groove Decorative 3D Wall Ceiling Panel
【SPECIFICATIONS】: Size - 12 X 12 X 2 inches, pack of 36; Coverage - 36 square feet; Weight...
As an affiliate, we earn on qualifying purchases.
As an affiliate, we earn on qualifying purchases.
How to Ventilate a Closet Rig Without Losing Silence
Proper ventilation is a must. Here’s a quick step-by-step: For more detailed tips, see this guide on acoustic dampening and setup.
- Install a quiet exhaust fan—look for models rated around 20-30 dB, similar to a whisper.
- Use ducting to direct hot air outside or into a vented attic.
- Add a thermostat-controlled fan to turn on only when temperatures rise.
- Seal gaps with weatherstripping or acoustic sealant to prevent noise leaks.
This setup keeps your rig cool without turning the closet into a noisy, hot mess. The challenge here is ensuring that the ventilation system is both quiet and effective enough to prevent heat buildup. Choosing the right fan and sealing all gaps prevents noise leaks while allowing heat to escape. The tradeoff is finding a balance: too much airflow might introduce noise, while too little risks overheating. Properly designed, this system can maintain a cool, silent environment that doesn’t compromise your noise reduction goals.

TroyStudio Portable Sound Proof Box, 16" x 12" x 16.2" Noise Reduction Enclosure, Light Blocking Quiet Cover, Soundproof Barrier for Ultrasonic Cleaner, Air Pump, Rock Tumbler & Generator
【DIMENSIONS & COMPONENTS】: Exterior dimensions: 16"L x 12"W x 16.2"H; Interior space: 12"L x 8"W x 14.2"H; Foldable...
As an affiliate, we earn on qualifying purchases.
As an affiliate, we earn on qualifying purchases.
Targeted Acoustic Treatment: The Key to a Clearer Voice
In a small, confined space like a closet, the biggest issue isn’t just noise—it's reflections. These cause echo and muddiness, especially with vocals or delicate instruments.
Start by treating the main reflection points: the side walls and the area behind your microphone or speaker. Use dense materials like moving blankets, thick foam panels, or even rugs to absorb sound where it bounces most. For more on acoustic treatment, visit this resource on acoustic treatment.
For example, I placed a thick blanket behind my mic and foam panels on the side walls. The difference was night and day—my recordings suddenly sounded crisp and less boomy, even though the closet was tiny.
Deep reflection points can cause comb filtering and muddiness, which obscure clarity and reduce the quality of recordings or mixes. By strategically treating these key areas, you effectively break the echo loop, making your sound cleaner and more professional. This targeted approach ensures you don’t waste materials on unnecessary spots, maintaining a balance between absorption and liveliness in your space.
Where to Place Acoustic Materials for Maximum Impact
Target the first reflection points, not every inch of your closet. Use a mirror to find where sound bounces back from the walls. Mark these spots and focus your treatment there first. You can learn more about optimal acoustic placement at this site on acoustic placement.
For example, a mirror held at eye level when facing the mic will reveal where the sound reflects. Cover those areas with foam or blankets. Don’t forget the ceiling and door, which often leak sound too.
In small spaces, broad coverage isn’t necessary—targeted placement is more cost-effective and efficient. Proper placement reduces echo and improves clarity without deadening the space completely. This balance allows for natural sound while minimizing distracting reflections, leading to a more accurate and professional-sounding recording environment.
Do You Need Bass Traps in a Tiny Closet? Yes or No?
In a small room or closet, low-frequency buildup is a real problem. Bass traps absorb these deep sounds, preventing the room from sounding boomy. For more advice on managing low frequencies, see this guide on acoustic treatment.
But in a tiny closet, it’s often more practical to focus on broad wall treatment and soft materials first. Bass traps are useful if you notice a muffled, muddy sound, or if you use bass-heavy instruments or vocals.
Adding bass traps in corners can help tighten the overall sound, especially when combined with wall absorption. However, overusing them in a small space might make the room sound unnaturally dead or hollow. The key is to listen critically: if your recordings sound boomy or muddy, then adding bass traps is a logical step. Otherwise, broad absorption and soft materials may suffice, saving you cost and space.
How Much of Your Closet Should You Treat? Focused or Full Coverage?
Less is more—especially in tiny spaces. Treat just the reflection points, corners, and surfaces that cause echo. Full coverage isn’t necessary and can make the space sound dull or dead.
For example, I only treated the side walls and behind the mic. My voice sounded clearer, and I avoided that unnaturally dull room sound that overly treated spaces develop. Over-treating can strip the natural liveliness from your recordings, making them sound sterile or boxy. The goal is to reduce problematic reflections while maintaining some natural room resonance for a balanced sound. Focused treatment allows for better control and a more natural, professional tone without sacrificing the room’s acoustic character.
The Cheapest, Most Effective Closet Studio Setup
Start with a few thick blankets or moving pads over the door and around the mic area. Use a good quality reflection filter if you record vocals. Combine these with a decent mic stand and a pop filter for best results.
Position your microphone at the reflection point—about one-third into the room from the wall—and use a mirror to find that spot. Add rugs or carpets on the floor to absorb sound bouncing from below.
For cooling, pair it with a simple, quiet exhaust fan, and keep the ambient temperature in check. This combo costs under $200 and can dramatically improve your sound and comfort. Remember, the goal is to make a manageable, budget-friendly setup that balances sound quality, heat control, and convenience, enabling you to produce professional-sounding recordings without breaking the bank.
Frequently Asked Questions
Can I record vocals in a closet without it sounding dead?
Yes. Focus on treating reflection points and avoid overusing foam or blankets. Using a reflection filter and some broad, targeted absorption will keep your vocals clear without sounding dull.What’s the main difference between soundproofing and acoustic treatment?
Soundproofing blocks noise from entering or leaving the space, usually through barriers and sealing gaps. Acoustic treatment improves sound quality inside the room by reducing echoes and reflections—it's about how the sound behaves within the space.Where should I put acoustic panels in my closet booth?
Place panels at the reflection points—on the side walls, behind your mic, and possibly the ceiling. Use a mirror to find where sound bounces back toward your ears or mic, then treat those areas first.Do I need bass traps in a tiny closet?
If you notice muddiness or boominess in your recordings, bass traps in the corners can help. But for most small closets, broad wall absorption and soft materials are enough initially.How do I keep my closet cool with a rig inside?
Use a quiet exhaust fan and ducting to vent hot air outside. Make sure to include a thermostat-controlled fan to prevent overheating, and seal gaps to contain noise without trapping heat.Conclusion
Moving your rig into a closet—if done right—transforms a noisy problem into a quiet solution. The key is balancing sound dampening with proper ventilation. Remember, the most effective fix isn’t just foam; it’s where you place your gear, how you treat reflections, and how you keep it cool.
Next time you set up a home studio, think about the space behind the scenes—literally. A little planning turns a cramped closet into a quiet, powerful workspace that’s easier on your ears and your hardware. Your perfect, silent studio is just a few tweaks away.